
A card. A thin slip of plastic that opens a door with a single tap.
That’s all an RFID card is, and you’ve almost certainly carried one. Probably several. Gyms, offices, banks, hotels, parking garages: a huge slice of the physical world runs on these things. Tap, click, you’re in.
Which is exactly why they matter on a physical penetration test. A cloned badge turns “locked out” into “walked straight in”: no lockpicks, no tailgating, no awkward conversation with the front desk. For an attacker, and for the tester simulating one, that unassuming card can be the entire engagement.
So how do you actually read one, copy it, or emulate it? You need the right hardware. This post walks through getting that hardware, the Proxmark3, built and running from scratch, explains what the cards it talks to really are, and finishes by cloning one end to end.
Installing the Proxmark3 (Iceman fork) #
We’ll build the client from source on Kali / Debian / Ubuntu using the RfidResearchGroup (Iceman) fork, the actively maintained firmware/client that most clones ship with.
Manufacturer: proxmark.org, SerialNumber: iceman.
1. Plug in the device and confirm Linux sees it #
Connect the Proxmark3 over USB, then check:
lsusb | grep -i proxmark
ls /dev/ttyACM*
You should see a ProxMark-3 RFID Instrument entry and a serial port like
/dev/ttyACM0. That /dev/ttyACM0 is how the client will talk to it.
If you want to peek at how it enumerated:
dmesg | tailLook for Product: proxmark3 and ttyACM0: USB ACM device.
2. Give yourself permission to use the serial port #
The port is owned by the dialout group. Add yourself once so you never need
sudo just to connect:
sudo usermod -aG dialout $USERLog out and back in (or reboot) for the group change to take effect. Check it stuck with:
groups | grep dialout3. Install the build dependencies #
This is the part that bites people. You need the ARM toolchain (for firmware), plus a handful of libraries for the client.
sudo apt update
sudo apt install -y --no-install-recommends \
    git ca-certificates build-essential pkg-config \
    gcc-arm-none-eabi libnewlib-dev \
    libreadline-dev libbz2-dev liblz4-dev \
qtbase5-dev libbluetooth-dev libpython3-dev libssl-dev libgd-devliblz4-dev is easy to miss. Without it the build dies with
fatal error: lz4frame.h: No such file or directory. The client links against
the system lz4, so this package is not optional.
What the less-obvious ones are for:
| Package | Why it’s needed |
|---|---|
gcc-arm-none-eabi |
Cross-compiler for the device firmware |
libreadline-dev |
Command history / line editing in the pm3 shell |
liblz4-dev |
Compression used by the client |
qtbase5-dev |
Optional graphical plot window (signal analysis) |
libbluetooth-dev |
Optional Bluetooth (BlueShark add-on) support |
4. Get the source #
git clone https://github.com/RfidResearchGroup/proxmark3.git ~/proxmark3
cd ~/proxmark3
5. Build it #
make clean
make -j$(nproc)
-j$(nproc) just uses all your CPU cores so it finishes faster. Expect a few
minutes.
Platform name: Proxmark3 RDV4 by
default. That setting only matters if you plan to flash firmware. For an RDV4
it’s correct; for a generic “Easy” clone you’d build with
make PLATFORM=PM3GENERIC. The client itself is platform-agnostic and will
connect to any Proxmark3 regardless, so for just using the device you can ignore
this.
When it’s done you’ll have the client binary at client/proxmark3.
6. Install it system-wide (optional but nice) #
So you can run pm3 from anywhere instead of from the source folder:
sudo make installNow launch it with:
pm3If you’d rather not install globally, you can always run it in place:
cd ~/proxmark3
./pm3
7. Verify the connection #
Quick one-shot test without entering the interactive shell:
pm3 -c "hw status"
# or, running from the source dir:
./client/proxmark3 -p /dev/ttyACM0 -c "hw status"
A healthy device prints something like:
[+] Communicating with PM3 over USB-CDC
[#] Current FPGA image
[#]   mode.................... fpga_pm3_hf.ncd ...
[#] Transfer Speed
[#]   Transfer Speed PM3 -> Client... 739328 bytes/s
Other useful sanity checks:
pm3 -c "hw version"   # firmware vs client version
pm3 -c "hw tune"      # antenna tuning (place a card on it)
If you get a clean hw status, you’re done. Fire up pm3 and start scanning.
Troubleshooting #
lz4frame.h: No such file or directory→ installliblz4-dev(step 3), thenmake clean && make -j$(nproc).- Permission denied on
/dev/ttyACM0→ you’re not indialoutyet, or you haven’t logged out/in since adding yourself (step 2). As a one-off you can prefix the command withsudo. - Client won’t auto-find the port → pass it explicitly with
-p /dev/ttyACM0. - Firmware/client version mismatch warning → reflash the device with the
matching firmware:
pm3 --flash --unlock-bootloader --image <...>(see the official docs; only needed if you actually want to update the firmware).
The hardware: what you’re holding #
Here’s the hardware that makes reading, cloning, and emulating these cards possible. Meet the Proxmark3:
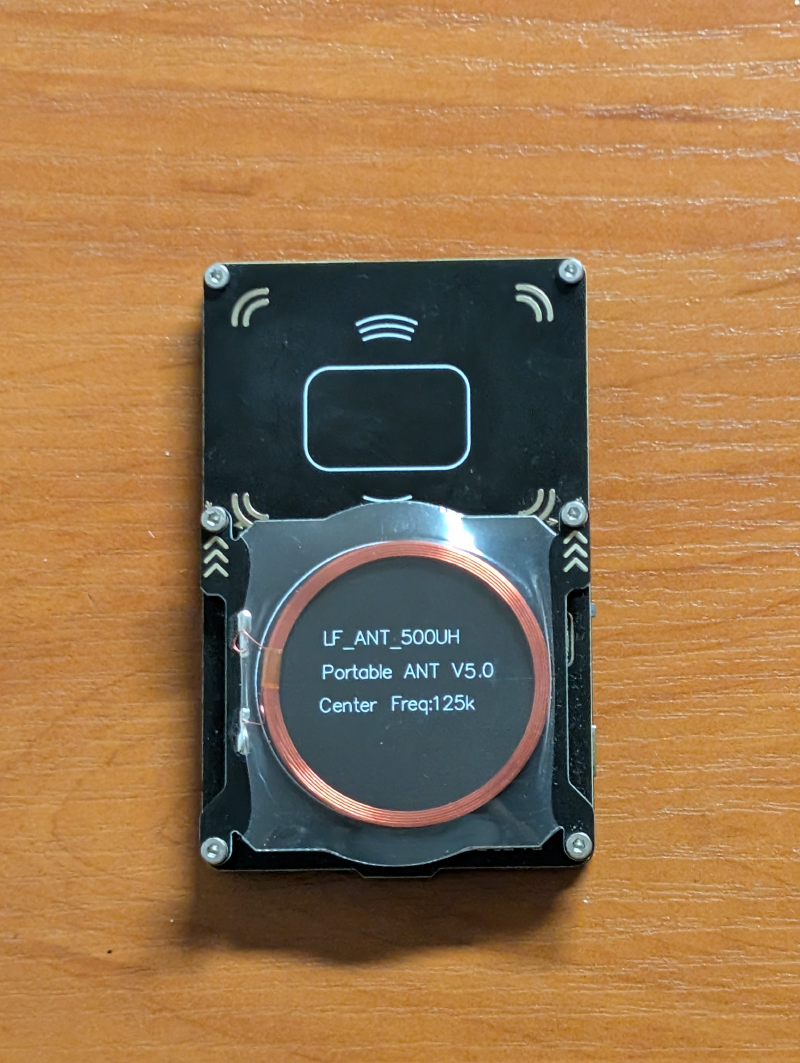
The Proxmark3 comes in a few flavours. The one pictured is the Proxmark3 Easy, the inexpensive, widely-cloned entry-level board, and honestly more than enough for learning and most day-to-day LF/HF work. At the premium end sits the Proxmark3 RDV4: the official high-end board with better antennas, onboard flash storage, and add-ons like the BlueShark (Bluetooth) module for going laptop-free. There are others in between (RDV2/RDV3, various “Ultimate” clones), but here’s the good news: the client software is identical across all of them, so everything in this guide works no matter which board you’re holding.
LF vs HF: two frequencies, two worlds #
RFID isn’t one technology. It’s two big families split by radio frequency, and the Proxmark3 speaks both:
- Low Frequency (LF), 125 kHz. The old guard. Simple, cheap, and often unencrypted: many LF tags just broadcast a fixed ID with no authentication. Think older building-access fobs (HID Prox), EM410x tags, car immobilisers, even pet microchips. Easy to read, easy to clone.
- High Frequency (HF), 13.56 MHz. The modern standard. More storage, faster, and capable of real cryptography. This is MIFARE Classic/DESFire, NTAG, contactless bank cards, passports, and your phone’s NFC / Apple Pay.
On the Proxmark3 this split is baked straight into the commands: lf for
125 kHz, hf for 13.56 MHz. So step one with any unknown card is always to
figure out which world it lives in, which is exactly what the commands below do.
Common commands to try #
Launch the interactive shell first. Everything below is typed at the pm3 -->
prompt (or you can run any of them one-shot with pm3 -c "<command>"):
pm3-h for help, e.g. hf mf autopwn -h. And
hw covers the hardware itself, lf is 125 kHz (low frequency), hf is
13.56 MHz (high frequency).
First things first: tune the antenna #
Put a card flat on the antenna and run:
hw tuneIt reports LF and HF voltages. A dip in voltage when a card is present means the antenna is coupling with it properly. Good baseline health check.
Identify an unknown card #
Don’t know what you’re holding? Let the Proxmark figure it out:
hf search      # sweep all 13.56 MHz tag types
lf search      # sweep all 125 kHz tag types
These tell you the tech (MIFARE Classic, Ultralight, DESFire, HID Prox, EM410x, T55xx, etc.) so you know which command family to use next.
MIFARE Classic: the bread and butter #
Get card details (UID, SAK, ATQA):
hf 14a info # or: hf 14a readerThen the one everybody wants: autopwn. It runs every known key-recovery attack (dictionary, darkside, nested, hardnested), recovers the keys, and dumps the card automatically:
hf mf autopwnWhen it finishes you’ll have a .bin/.json dump saved in the current folder.
From there:
hf mf dump            # re-dump using recovered keys
hf mf restore         # write a dump back to a (magic/changeable) card
Other common tag families #
hf mfu info           # MIFARE Ultralight / NTAG
hf mfdes info         # MIFARE DESFire
lf hid read           # HID Prox cards
lf em 410x reader     # EM410x (common 125 kHz fobs)
Sniffing / detection mode #
Capture the conversation between a real reader and a card (man-in-the-middle):
hf 14a sniff          # start sniffing 13.56 MHz; press the Pm3 button to stop
trace list -t 14a     # decode and show what was captured
There’s an lf equivalent (lf sniff / lf read) for 125 kHz. Sniffing is how
you grab credentials when you can’t just present the card to the device yourself.
Scripts #
The Iceman fork ships with a pile of helper scripts (Lua) for multi-step or automated tasks:
script list           # see everything available
script run <name>     # run one, e.g. script run hf_mf_autopwn
These are great for repeatable workflows you don’t want to type out by hand.
Standalone mode: the button #
The Proxmark3 has a physical button, and it can run standalone modes with no computer attached, handy for field work where you just carry the device and a battery / power bank.
This build ships with MattyRun (HF MIFARE Classic chk/ecfill/sim), which
you saw in hw status. Rough flow:
- Unplug from the laptop and power it from a battery / power bank.
- Press the button to arm the standalone mode (LEDs indicate the state; different blink patterns mean reading, key-cracking, emulating, etc.).
- Tap a card to the antenna; it checks keys and stores what it finds.
- Press the button again to switch into simulate/emulate mode and replay the captured card at a reader.
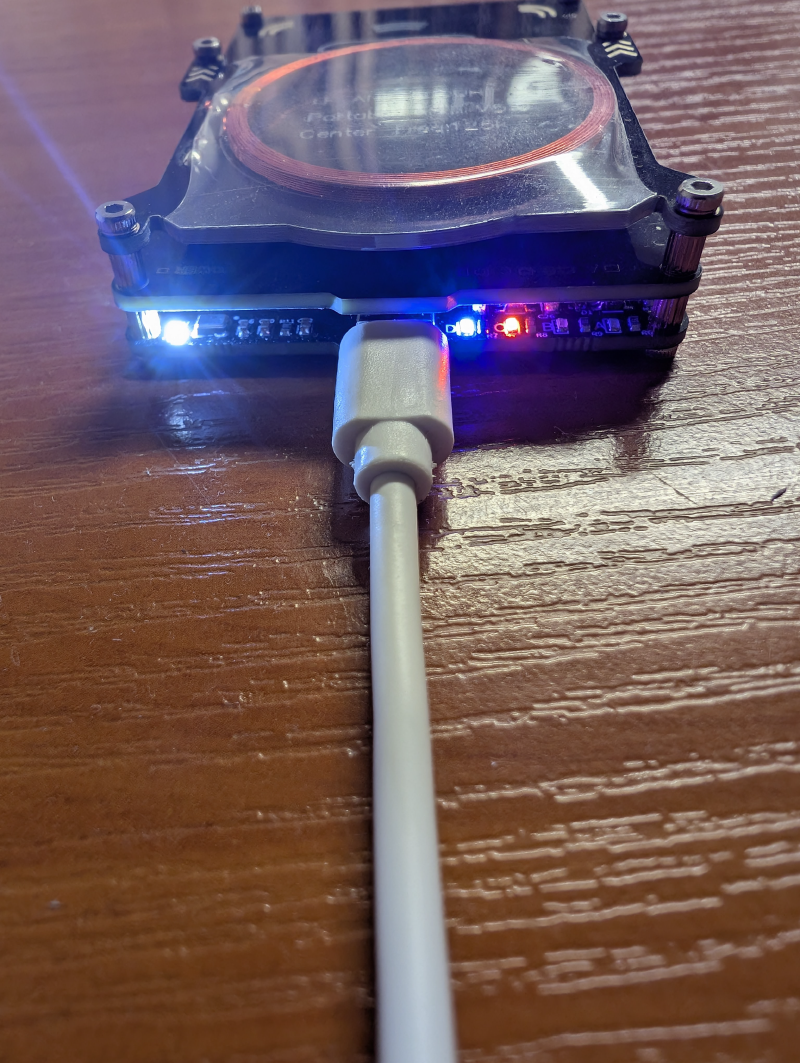
When you get back, plug into the laptop, run pm3, and pull whatever it stored
out of the device’s memory. Exact button/LED behaviour depends on which
standalone mode is flashed; check the
standalone modes docs
for the one you’re running.
exit (or quit).
Demo: cloning a card end to end #
To tie it all together, here’s the whole flow on a real card.
I’ve got a blank HF card on hand:
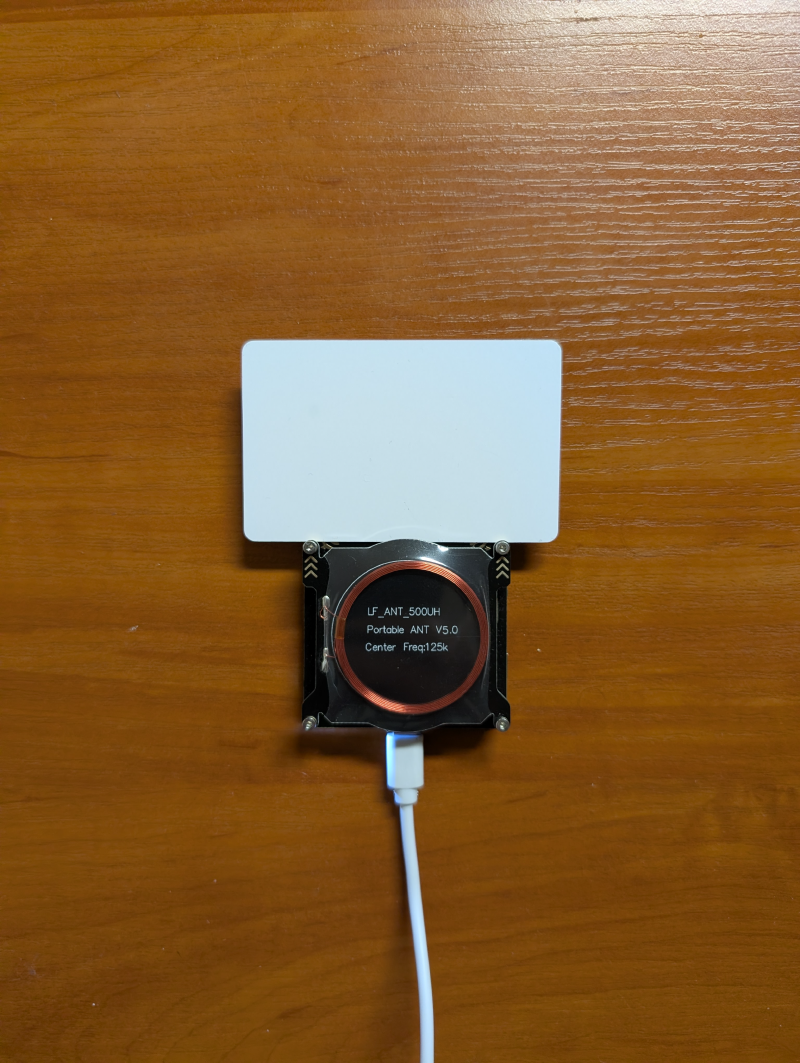
First, we identify it with hf search:
[usb] pm3 --> hf search
[/] Searching for ISO14443-A tag...
[=] ---------- ISO14443-A Information ----------
[+]  UID: 86 E1 91 03   ( ONUID, re-used )
[+] ATQA: 00 04
[+]  SAK: 08 [2]
[+] Possible types:
[+]    MIFARE Classic 1K
[=]
[=] Proprietary non iso14443-4 card found
[=] RATS not supported

[+] Magic capabilities... Gen 1a
[#] Static nonce....... 009080a2
[+] Static nonce....... yes

[?] Hint: Use `hf mf c*` magic commands
[?] Hint: Try `hf mf info`

[+] Valid ISO 14443-A tag found
The Proxmark tells us it’s a MIFARE Classic 1K, one of the most common (and
most thoroughly broken) HF cards out there. That means we can try to recover its
keys, dump it, and from there clone or emulate it. Time for hf mf autopwn:
[usb] pm3 --> hf mf autopwn

[#] Static nonce....... 009080a2
[+] loaded 8 user keys
[+] loaded 63 hardcoded keys
[=] Running strategy 1

[+] -----+-----+--------------+---+--------------+----
[+]  Sec | Blk | key A        |res| key B        |res
[+] -----+-----+--------------+---+--------------+----
[+]  000 | 003 | FFFFFFFFFFFF | D | FFFFFFFFFFFF | D
[+]  001 | 007 | FFFFFFFFFFFF | D | FFFFFFFFFFFF | D
[+]  002 | 011 | FFFFFFFFFFFF | D | FFFFFFFFFFFF | D
[+]  003 | 015 | FFFFFFFFFFFF | D | FFFFFFFFFFFF | D
[+]  004 | 019 | FFFFFFFFFFFF | D | FFFFFFFFFFFF | D
[+]  005 | 023 | FFFFFFFFFFFF | D | FFFFFFFFFFFF | D
[+]  006 | 027 | FFFFFFFFFFFF | D | FFFFFFFFFFFF | D
[+]  007 | 031 | FFFFFFFFFFFF | D | FFFFFFFFFFFF | D
[+]  008 | 035 | FFFFFFFFFFFF | D | FFFFFFFFFFFF | D
[+]  009 | 039 | FFFFFFFFFFFF | D | FFFFFFFFFFFF | D
[+]  010 | 043 | FFFFFFFFFFFF | D | FFFFFFFFFFFF | D
[+]  011 | 047 | FFFFFFFFFFFF | D | FFFFFFFFFFFF | D
[+]  012 | 051 | FFFFFFFFFFFF | D | FFFFFFFFFFFF | D
[+]  013 | 055 | FFFFFFFFFFFF | D | FFFFFFFFFFFF | D
[+]  014 | 059 | FFFFFFFFFFFF | D | FFFFFFFFFFFF | D
[+]  015 | 063 | FFFFFFFFFFFF | D | FFFFFFFFFFFF | D
[+] -----+-----+--------------+---+--------------+----
[=] ( D:Dictionary / S:darkSide / U:User / R:Reused / N:Nested / H:Hardnested / C:statiCnested / A:keyA  )


[+] Generating binary key file
[+] Found keys have been dumped to `/home/user/hf-mf-86E19103-key.bin`
[=] --[ FFFFFFFFFFFF ]-- has been inserted for unknown keys where res is 0
[=] Transferring keys to simulator memory ( ok )
[=] Dumping card content to emulator memory (Cmd Error: 04 can occur)
[=] downloading card content from emulator memory
[+] Saved 1024 bytes to binary file `/home/user/hf-mf-86E19103-dump.bin`
[+] Saved to json file /home/user/hf-mf-86E19103-dump.json
[=] Autopwn execution time: 2 seconds
And there it is: every key recovered in 2 seconds. Look at the res column.
Every single one came back D, meaning Dictionary. The card is still using the
factory-default key FFFFFFFFFFFF on all 16 sectors. No cryptographic attack
needed; autopwn just tried the well-known defaults and walked right in. That’s the
reality on a huge number of MIFARE Classic deployments in the wild.
From this point the dumped data can be written onto a “magic” card with
hf mf restore to clone it, or replayed straight from the Proxmark with
hf mf sim to emulate it. Game over.
That’s the entire premise of badge cloning on a physical engagement, condensed into two commands, and exactly why these little plastic cards deserve more respect than they usually get.
So how do we make the attacker’s job harder and more annoying? #
Everything above worked because the card was the soft kind: a MIFARE Classic still wearing its factory-default keys. Breaking it took two seconds. So let’s flip sides and turn that two-second win into a long, frustrating afternoon for whoever’s holding the Proxmark.
- Stop shipping default keys.
FFFFFFFFFFFF(and the other well-known defaults) is the first thing every dictionary tries. If your cards still use them, you don’t have access control, you have a speed bump. - Retire MIFARE Classic for anything that matters. Its crypto (Crypto-1) has been broken for over a decade. Move to MIFARE DESFire EV2/EV3 or similar, with real AES and secure messaging. This is the single biggest upgrade.
- Use diversified keys. One key per card, derived from the UID, instead of one master key shared across every badge in the building. Crack one card and you’ve got… that one card, not the whole site.
- Add a second factor on sensitive doors. A cloned badge is useless against a reader that also wants a PIN or a face. Defence in depth beats any single token.
- Protect the reader’s wiring. A lot of access systems still talk Wiegand, an ancient, unencrypted protocol, over the cable behind the reader. Tap that cable and you skip the card entirely. Mount readers so the wiring isn’t reachable, and move to OSDP (encrypted) where you can. (More on attacking that wiring in a future post.)
Leveling up: pairing the Proxmark3 with other gear #
The Proxmark3 is the Swiss-army knife, but its read range is only a centimetre or two. On a real job you often want a card without asking the target to hold still against your device. That’s where other tools come in:
- Long-range readers (e.g. the DL533N XL). These push read distance well past the Proxmark’s couple of centimetres, enough to lift a card from a pocket or bag as someone walks past. (On my wishlist.)
- Wiegand implants (e.g. the ESP-RFID Tool). Instead of touching the card at all, these tap the wiring between a reader and its controller and quietly log every badge that scans, served up over a little Wi-Fi hotspot. I’ve got one, and it’s getting its own post soon, so keep an eye out.
Useful links #
- Proxmark3 Iceman fork (GitHub): the firmware/client this guide builds.
- Iceman fork wiki: the closest thing to official docs; command references and walkthroughs.
- Proxmark community forum: where the hard questions get answered.
- MIFARE (Wikipedia): background on the card families and the Crypto-1 break that makes Classic so easy.